Discord is a community-focused platform for chatting, talking and collaborating. Originally targeting gaming communities, but rapidly increasing in popularity for educational & support purposes, Discord has earned its seat among the big chat applications like Slack, Teams and Zoom. There are multiple ways you can extend Discord as a developer, but today we will learn how to extend Discord by creating our very own Bot using .NET 5.0 (.NET Core)!
Requirements
- Visual Studio 2017/2019
- .NET Core 2.1 or up (We will be using .NET 5.0)
- Discord.Net NuGet Package
Creating a new Application
We will start off by creating our application (Bot) in Discord first! This is so that we have our access-token available once we reach the coding part of this guide! To do this, we'll head over to the Discord Applications Portal first.
- Visit the Discord Applications Portal.
- Create a new application.
- Give the application a name (this will be the bot's initial username).
- On the left-hand side, under Settings, click Bot.
- Confirm the "Build-A-Bot" popup.
We now have our Bot Application made!

Attachment 1. Build-A-Bot
Adding your bot to a server
Bots cannot use invite links; they must be explicitly invited through the OAuth2 flow.
- Open your bot's application on the Discord Applications Portal.
- On the left-hand side, under Settings, click OAuth2.
- Under the section "OAuth2 URL Generator", check the 'bot' option.
- Scroll down further to Bot Permissions and select the permissions that you wish to assign your bot with. (We'll be using Administrator for the sake of ease, but you can restrict it as you wish!)
- Open the generated authorization URL in your browser.
- Select a server.
- Click on Authorize.
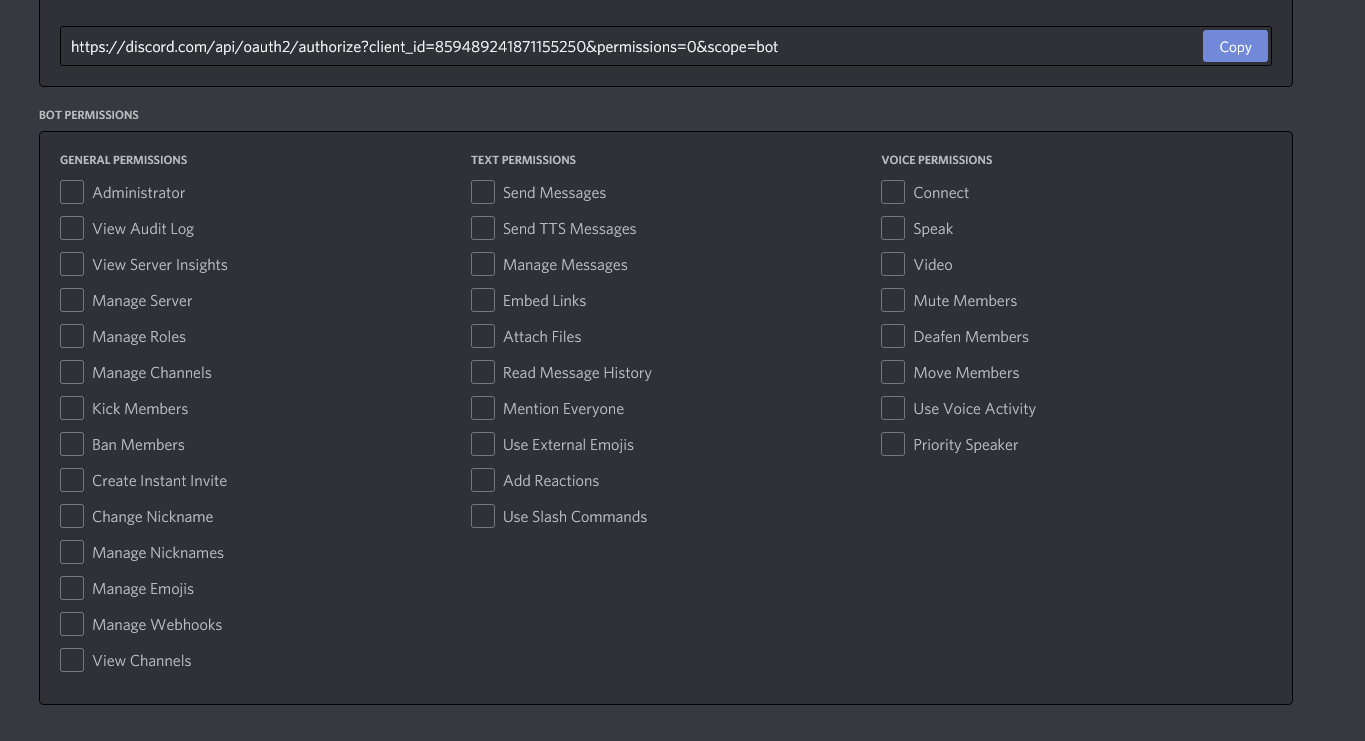
Attachment 2. Bot Permissions
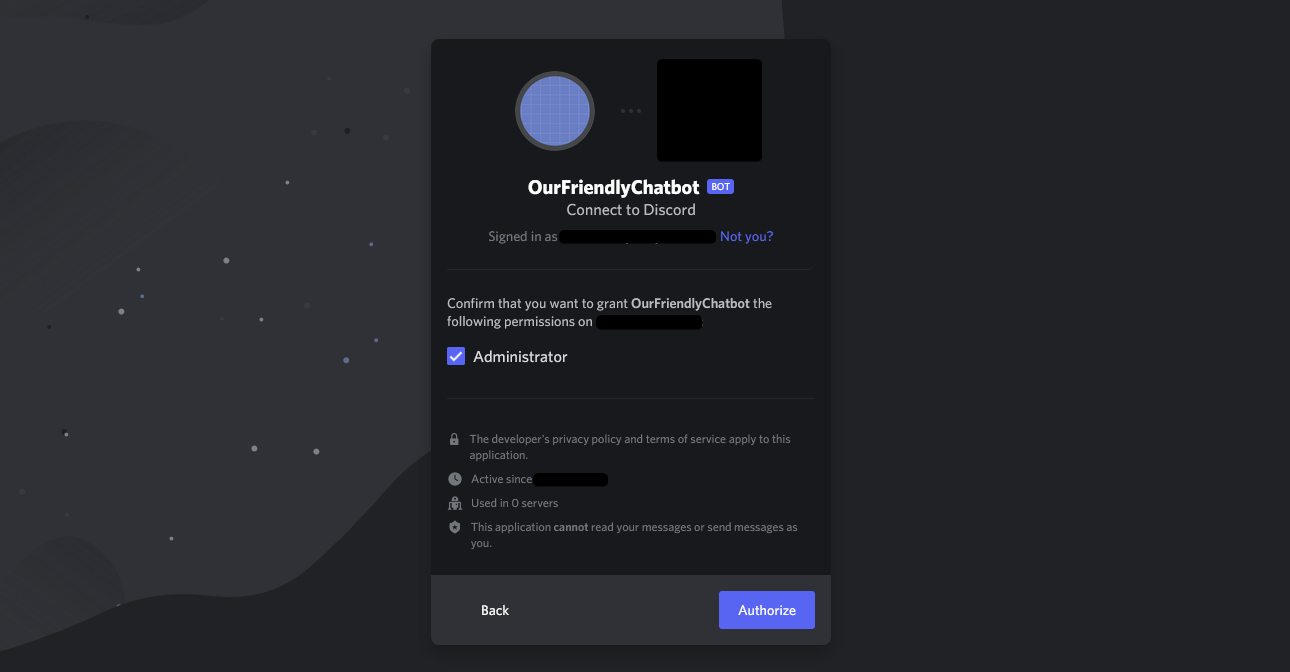
Attachment 3. Adding our bot to a server
Coding your new Bot
Let's head over to Visual Studio to create a new Project to work in! For this guide, we will be using Visual Studio 2019, to create a C# based Console Application, based on .NET 5.0.
If you do not have these options available, make sure your Visual Studio is up-to-date, and that you have the proper SDK's installed, available over at the Microsoft Website.
Once we have our empty Console application created, we will need to add the Discord.Net NuGet package to our project, available over at Nuget.org. We will be using version 2.4.0 today! For more information about this Nuget package, visit the Discord.Net Github repository.
Async
Discord.Net uses .NET's Task-based Asynchronous Pattern (TAP) extensively - nearly every operation is asynchronous. It is highly recommended for these operations to be awaited in a properly established async context whenever possible.
To create our async context, we will be creating an async main method in our console application, and rewriting our static main method to invoke a new async main.
Next we will configure our program to create a new Discord Socket Client, and configure our Access Token. For this guide, we will be hard coding our access token into our Main method, but a public or production application, best practice would be to store your Token in a configuration file or environment variable.
You can find your token over at the Bot tab in the Discord Developer Applications site, under the Build-A-Bot section where we created our bot earlier. There will be a "Click to Reveal Token" button available!
Your first Event
We are now able to run our application, and see that our newly created bot runs successfully! The thing is, is doesn't do much...yet! Let's add some functionality to our bot to get you started.
Logging
Our first task will be to give us, the developer, some feedback about what are bot is receiving and sending. For this, we will be create a new Task called Log, which will write all Log Messages we receive to our console. You can also write these to disk, to a database, you can implement it however way you seem fit! We will add this Task to our _client.Log events, and that will be enough for now to get the feedback we want!
Receiving & Sending Messages
Our second task will be to run a function when our bot receives a message in any of its servers. For this, we will use the _client.MessageReceived events. We will create a new Task that takes in the parameter 'SocketMessage' , and returns a Task.CompletedTask once we have finished processing it!
Let's make our bot react to any messages that start with the phrase '!helloworld', and have it output a sentence that involves the Author of said message. There are many ways to handle such events, but the most basic way is to do a string compare against the content of our message, and if it matches, send an Async message back to the channel the original message was sent in.
This forms the basis of your basic custom Discord command! Our socketMessage object contains a lot of information about the message we receive. Not just the message itself, but also it's author, channel, server, mentions, when it was created, if it contains any reactions and more!
The following code snippet represents the functions as described above, for our log & helloworld event/command.
Noteworthy Events
We've demonstrated how to hook into the Log and Message Received Events, but the discord API (and therefor Discord.Net) offers a wide variety of useful events to hook into! Here are some noteworthy events worth experimenting with! (Note: there are many more available!)
- Channel Created, Updated, & Destroyed
- Joined & Left Guild
- Reaction Added & Removed
- Role Created, Updated, & Deleted
- Message Updated & Deleted
- Many more!
🚀 Congratulations, you have successfully created your first Discord Bot using .NET! 🔥
Conclusion
This article shows the process of creating a Discord bot from scratch using the Discord Developer Application portal, connecting our bot to a server, hooking into the bots' SocketClient, and hooking into the events fired from said SocketClient to read and write messages to and from a Discord server!
If you have any further questions, feel free to contact me over at my socials available at the Contact page, and I'd love to hear about the amazing creations you're able to come up with, with this guide!
Sources used in this article:
Introduction Guide to Discord.net, https://docs.stillu.cc/guides/introduction/intro.html
Creating a discord bot using .net core, https://swimburger.net/blog/azure/creating-a-discord-bot-using-net-core-and-azure-app-services
Asynchronous Programming, https://docs.microsoft.com/en-us/dotnet/articles/csharp/async